Metadata uploads
This page covers metadata upload in the Trakka web interface. For information on uploading data from the command-line, see the CLI metadata upload page.
Metadata is linked to a particular Seq_ID and may include sequence, sample, or case/patient metadata. It is uploaded as a CSV or Excel spreadsheet, and validated against a chosen proforma.
Finding the right proforma
Proformas allow customised data validation and give permission to modify particular metadata fields. They define which metadata fields are required or allowed for a particular data submission. Excel proforma templates are available for download, but are for convenience and need not be used so long as the uploaded file contains the correct fields.
There are two ways to find the proforma description and template you are interested in, and in most cases both will be available to you:
Project proformas: If the proforma you want to use is associated with a particular project,
you can find it by navigating to that project and selecting the Proformas tab. You can click on
the desired proforma to access the proforma detail page, which lists the required and allowed
fields, and provides a link to download an Excel template if one exists.
From the metadata upload page: Once you select one of the proformas available to you on the metadata upload page (see below), a link to the proforma detail page will appear. This works for all proformas, even if they are not associated with a project.
You will only be able to see and use a particular proforma if you have been granted access to it, usually via the Uploader role in a project.
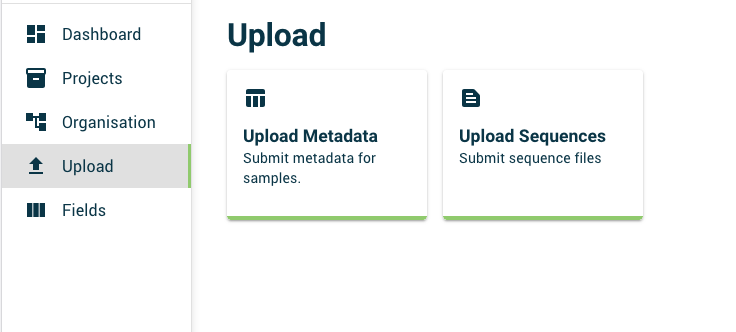
Uploading metadata
To upload metadata, click on the Upload entry in the sidebar, and then select the Upload Metadata option.
On the metadata upload page, you will see three main sections:
- The Data ownership and validation section, where you can select the organisation which will own the uploaded data, any projects to share sample records with, and which proforma to upload against.
- The Upload options section.
- The Select file section, where you can drag-and-drop or browse for a file to upload.
Data ownership, sharing, and validation
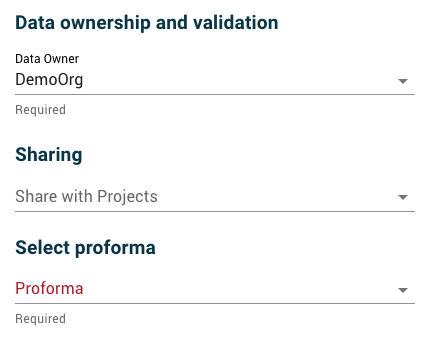
Data owner: The data owner will by default be set to your own organisation if you have Uploader rights within it. If you have permission to upload data on behalf of other organisations, you can select a different owner organisation from the dropdown menu. It is important to set the data owner correctly, as by default, any new Seq_IDs in the uploaded data will result in the creation of new sample records owned by this organisation. Note that you cannot change the ownership of existing sample records using this interface.
Share with projects: You can select one or more projects to share samples with. If you are creating new sample records and do not share with any projects, the metadata will not be accessible via any project views.
Proforma: Select the proforma you wish to use for data validation. This field is mandatory. Only proformas which you have been granted access to will be listed. Once you select a proforma, a link to the proforma detail page will appear, where you can see the required and allowed fields, and download an Excel template if one exists.
Upload options
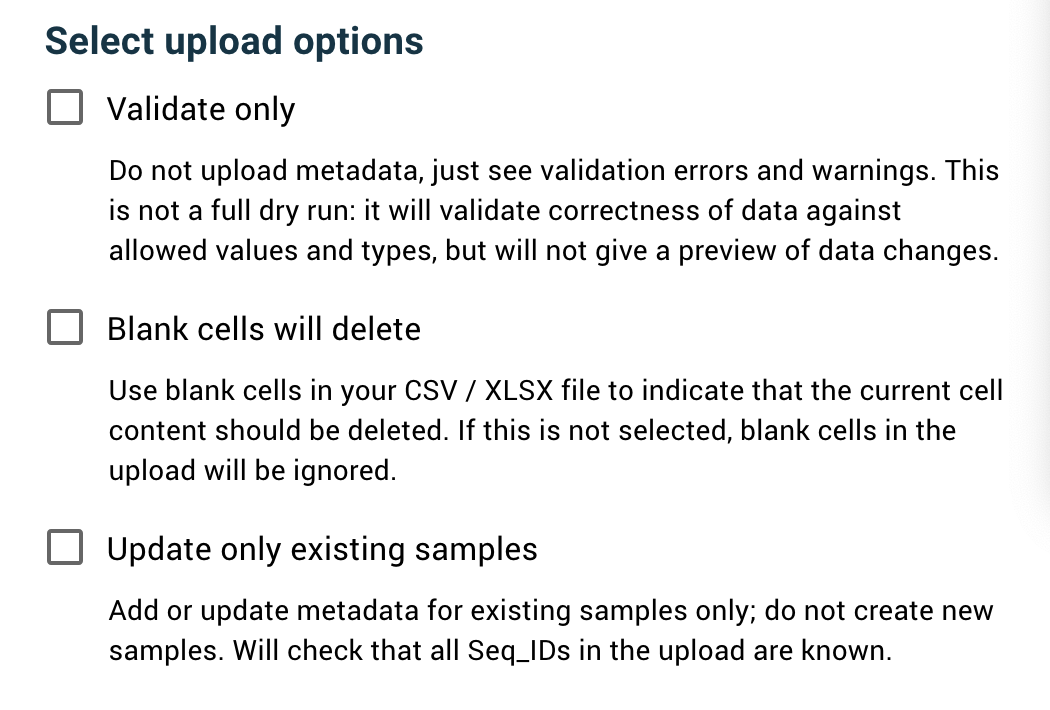
Validate only: If this option is selected, the contents of the metadata file will not be saved. Trakka will validate the data against the selected proforma, and report any errors or warnings. This is not a full dry-run, as it will not report on data changes.
Blank cells will delete: If you upload metadata to an existing sample record which already has metadata values, by default blank cells will be ignored. Select this checkbox to set the corresponding metadata values to empty wherever there is an empty cell in the upload.
Update only existing samples: By default, if your upload contains Seq_IDs which do not already exist in the database, new sample records will be created for them. Select this checkbox to restrict the upload to updating existing records only. Any Seq_IDs in the upload which do not already exist will be ignored.
File selection
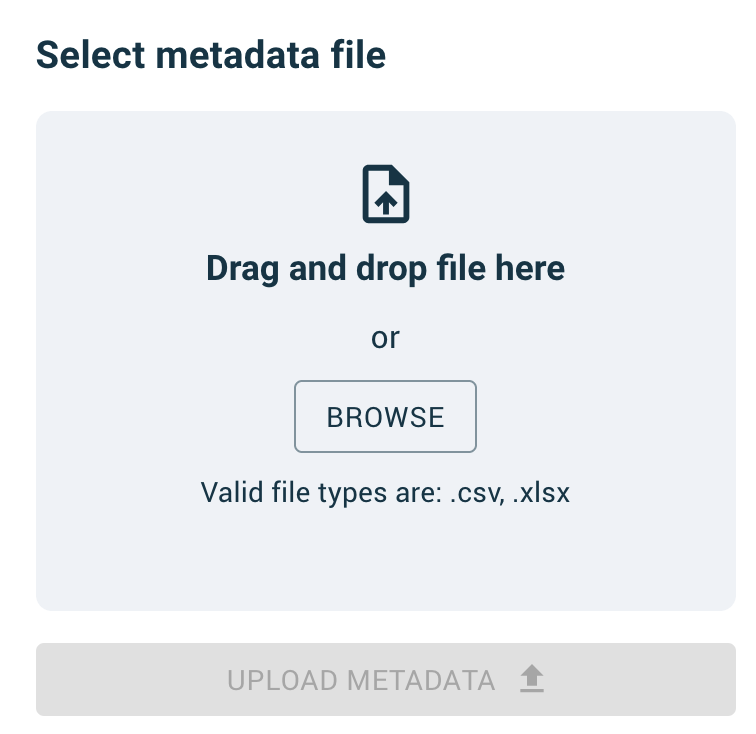
Click on the Browse button or drag-and-drop a file to select an Excel or CSV file for upload.
Once you have selected a file, and selected at least data owner and proforma, you will be able to submit data. Any errors or warnings, including validation errors, will appear in the lower part of the screen.